In this article, I’d like to say a couple of words about how to equalize distorted guitars.
Simple Equalization
If the guitar tone at the output of the amplifier completely suits you,
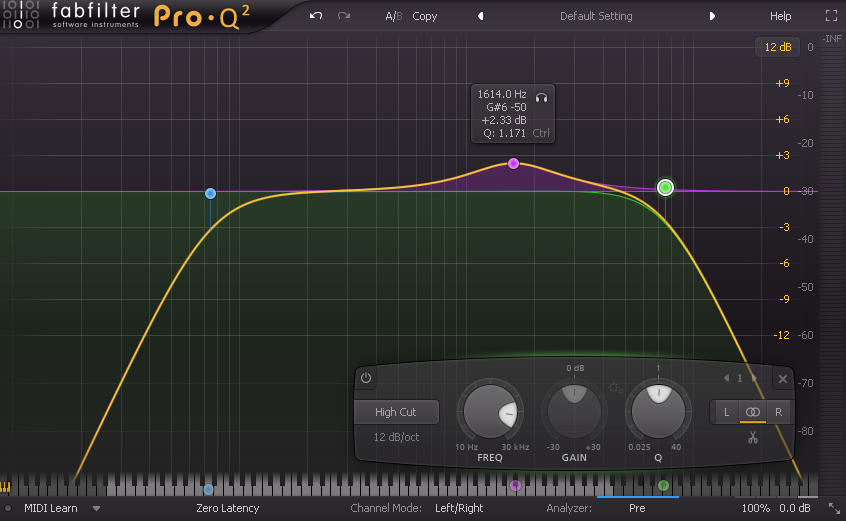 consequently, you are lucky and the equalization procedure will be incredibly simple:
- Cut low-frequency mumbling with a High Pass filter in the range of 60–120 Hz. These frequencies are of no use. They will only add some muddiness to a mix and going to clutch with bass guitar sound.
- Cut high-frequency hissing that inevitably emerges in heavily distorted guitars. Approximately in the region of 8–10 kHz depending on the guitar tone and the type of the used distortion whereby clearing the space for hi-hats.
- Make a little enhancement with a narrow band (Q = 1.5–3) in upper mids for better guitar audibility in the mix.
As you see in the picture, there isn’t anything complicated!
Advanced Distortion Guitar Equalization
If your ears say that it’s necessary to go further, there are the following options:
1. Surgical EQing.
This equalization is often the continuation of the previous 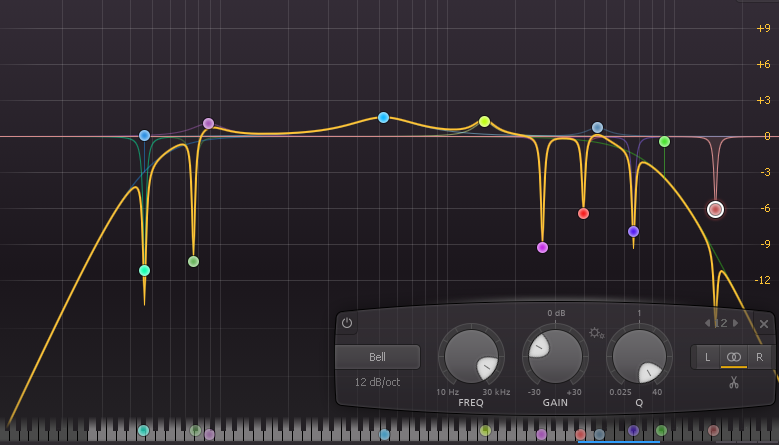 technique and is fairly often used in hard rock music mixing. It is aimed at building a fatter, warm guitar tone due to taming down some resonances. This first and foremost refers to the attenuation of the resonances in upper mids that make the sound of the distorted guitar too edgy.
In this case, it’s necessary to work with an equalizer with extremely narrow bands. On my favorite Pro-Q2 from Fabfilter, the parameter Q is equal to 40. Later you can correct this value.
Define the precise value of the frequency that irritates you by enhancing each band by 10–12 dB and moving it up and down the frequency scale. This technique of electric guitar equalization allows you to easily and fast detect the resonances subjected to cutting out. It’s hard to say how many cuts should be made altogether: everything depends on the initial guitar tone and your vision of the mix.
It’s sometimes necessary to carry out the same procedure with low mid to tame too buzzing resonances.
After you remove the excessive, you can make several boosts in Mids to achieve even much warmer and fatter sound.
2. Equalization with the use of VST emulations of vintage equalizers
I’d refer this type to the final processing when strictly 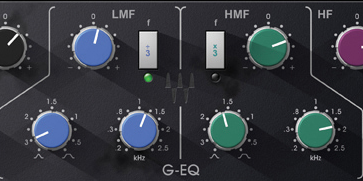 technical equalization has been carried out, but the guitars lack “something” to ideally blend in with the mix. Probably, a deficit element is a saturation and the specific character added by these devices. As a rule, the own plugin saturation already sets the necessary tone, and 1–2 small enhancements of Mids are sufficient to get a final guitar tone.
You can use vintage equalizers in any combination with the techniques described above. It all depends on your vision of the mix.
This article can’t definitely give a single answer to the question of how to EQ distorted guitars as this reply doesn’t simply exist. Yet I hope it will be a good start for your experiments with sound!
How to achieve an ideal tone of guitar distortion
Below I want to expand the topic and give you a deeper understanding of how the guitar distortion tone is created. Because at the end of the day the job of any distortion guitar mixing technique is just to accentuate, emphasize the character of the guitar that already sounds right for your song. Building a solid distortion tone, that works well even being unprocessed is essential.
Let’s start with evident things. Apart from the guitar itself, you need an amplifier (a so-called guitar amp head) and a guitar cabinet – in plain language, an acoustically designed box with speakers. The same two components are basic to shape the final tone of guitar distortion.
So, let’s get going!..
1. A guitar amp head
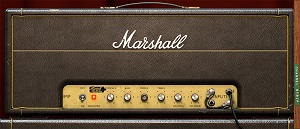
Exactly it sets the basic character and the tone of guitar distortion. Distortion aggressiveness, “grit” size, focusing on one or another frequency range and, let’s say, compression level of these frequencies – the guitar amplifier solves all this. You can correct these parameters to the exact task or the desired sound tone a little – but you can’t change the character of distortion totally! That is why you should start the building up guitar sound chain precisely with an amplifier. Define clearly your task and select the most appropriate amplifier.
2. Cabinet
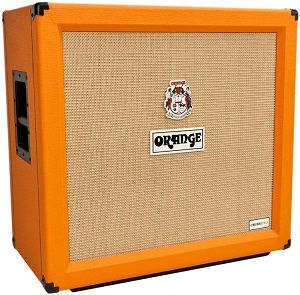
The cabinet goes next, this component is as much important as the previous one. Its acoustic structure along with built-in loudspeakers totaled up plays the role of an equalizer with a very complicated envelope form. While going through this living equalizer, distortion sound gets a specific recognizable "Guitar" tone. The recommendation is the same – try to select a cabinet whose sound corresponds to your perceptions about the desired sound at most. Which will make the task of mixing electric guitar much easier! Afterward, you can correct the guitar sound by enhancing or attenuating some frequencies. Nevertheless, the overall tone and character remain the same.
Then the very true alchemy will start! It’s in principle impossible to describe all probable options, but I’m trying to clarify basic moments that influence the final sound of guitar distortion. Keep them in mind for your own searches for an ideal tone.
RECOMMENDED ARTICLES:
- HOW TO MASTER MUSIC LOUDER AND WITH MORE COLOR
- HOW TO ADD PUNCHINESS TO A KICK DRUM
- HOW TO MIX ORCHESTRAL MUSIC
- HOW TO ADD DYNAMICS TO A MIX IN 1 STEP
3. Microphones
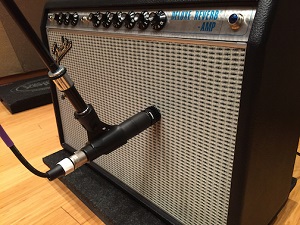
There is a well-known technology of electric guitar recording used for decades when the sound at the outlet of the cabinet is recorded with a microphone (or two mics and more) placed close to speakers in a particular way.
So, the type and the position of the microphone have a tremendous bearing on how the record will sound.
There is a completely standard technique to get fat and juicy sound of guitar distortion; you should place the first microphone accurately opposite the speaker center of the cabinet (here, the most vivid sound “lives”), and the second mic – at the periphery where the speaker gives foremost low frequencies. Exactly the combination of these signals in the proportion of around 50%–50% adds rich sound to guitars – fat, nevertheless, clear and easy-to-read in the mix.
It’s still all understandable, isn’t it? Yet imagine that:
- you can use microphones with a small or large-diaphragm
- condenser, dynamic, ribbon mics
- you can place them as close to the speaker as possible by using the maximum of their sensitivity; or move them 2–4 inches away by using the restricted sensitivity radius of the microphone as an additional instrument of sound color
- you can place the microphone at an angle up to 45 degrees towards the speaker by selecting what frequencies to lay emphasis on as well.
There are already plenty of options as you can see!
Go on further…
4. A tone knob
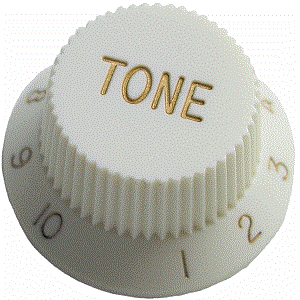
This is the simplest tool, which literally every guitarist has, to shape the sound. In the meantime, you often simply forget about it. The tone knob built in each electric guitar represents a High-Cut filter. There is no equalization in the knob position 10. And at the output, the guitar gives, let’s say, its own basic tone. While turning the knob down to position 1, this simplest filter gradually cuts off upper frequencies, making the source guitar sound duller. And sound tone at the output of the amplifier in fact directly depends on what signal was sent to the input! That is why, while starting the setting, make sure that the tone knob is in the 10 position. Then if you feel a lack of something, you can turn it to adjust the tone. For example, turning the knob to the side of “darkening” is an excellent and simple way to make the guitar sound less screechy. On a high-sounding solo, there is probably a point in turning the tone knob to position 1 for a more warm sound!
5. DI track processing
While developing the theme of preparing the sound to turn into a trendy aggressive distortion tone, I’d like to be digging more into processing that precedes the amp head. Whatever you process with hardware devices or with the help of plugins, its key point remains the same.
Equalization
This method helps you to set the tonal balance of distortion guitars even much finer and is in fact the development of the previous item of the article. While enhancing or attenuating a certain frequency range, you can enhance emphasis in the final sound.
For example, the frequency attenuation in the region of 4 kHz by 1–3 dB on the DI track will allow you to reduce the sharpness of rhythm parts and give them more depth. It’s possible to add (or replace) this technique by making small enhancements in the range of 80–120 Hz.
As always during work with sound, the difference “before and after” will be fairly subtle, but exactly the set of such small steps is the right way to the perfect sound.
Compression
The sound of contemporary trendy guitar distortion is as a rule notable for high density. To achieve it is seemingly simple – to turn up gain on the amplifier more and to finish compressing all this with a compressor. As the result, you will get too dull and lifeless sound. However, there is a solution – compression not after but before the amplifier. In the meanwhile, it’s beneficial to use a valve compressor or its emulations – their own saturation, on top of that, will play the role of warming up and will add slight distortion without damaging the guitar sound with an excessive gain level.
"Warming up"
Here, there is no need to explain in more detail – the use of slight distortion with the help of the pedal Ibanez Tube Screamer (or its software emulations) before the amplifier became a commonly-known technique.
We can also attribute the use of boosters here. In both cases, the purpose of processing is to prepare the sound for basic processing with an amplifier by adding slight distortion beforehand.
Finally, the simplest but quite effective!
Volume
While controlling the level of the input signal, you can regulate distortion character significantly without changing the gain value for this purpose. You can get more aggressive distortion, in the meanwhile, without depriving the guitar of liveliness and energy!
6. Processing after the amplifier
At this stage, as a rule, eqing distorted electric guitar is used - which we've reviewed in detail above. It refers to cutting unnecessary resonances and shaping a final tone.
The further processing with compression (including multiband one) already falls into the task of getting the guitar seated nicely in the exact mix.
As you see, shaping guitar distortion is the true sound alchemy, and, at first sight, a great number of options can beat you out of reason. However, it’s nothing to get scared of! With experience, you will sort out the role of each kind of the described processing and will learn to feel whether you need it or not in the exact case. To begin with, keep experimenting – now you are familiar with all the necessary instruments!
